
Not all reports listed below are required for every engagement; please confirm with your Optimized Payments Account Manager which reports you should download.
Jump to Reports
CLX/CCC Funding Adjustment Report
CLX/CCC Settlement Report
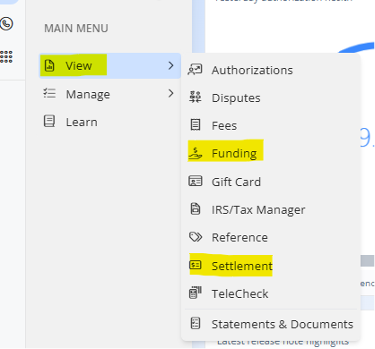
Path: Main Menu → View → Settlement → Search → Select Fields → Save or Schedule → Confirm
-
From the home page, open the Main Menu, click View, then click Settlement.
-
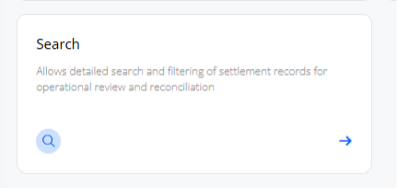
Click the Search tile to open the settlement search screen.
-
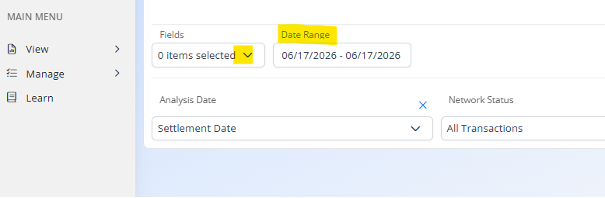
Set your Date Range. If you need a large amount of data, run a few smaller date ranges instead of one large one — this helps prevent the report from timing out.
-
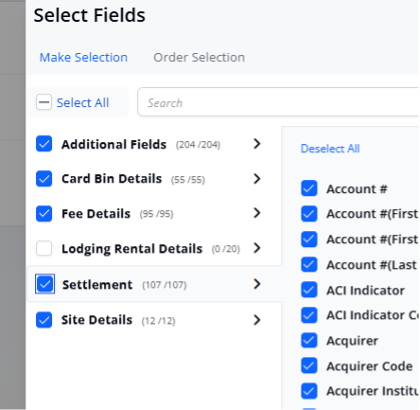
Click the Fields dropdown to open Select Fields, then choose what to include:
-
Click Select All
-
Deselect Lodging Rental Details — this is the only category that should stay unchecked
-
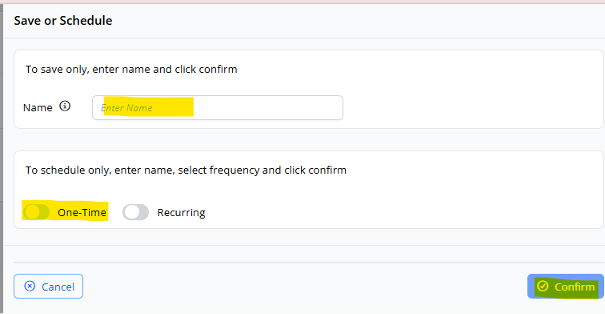
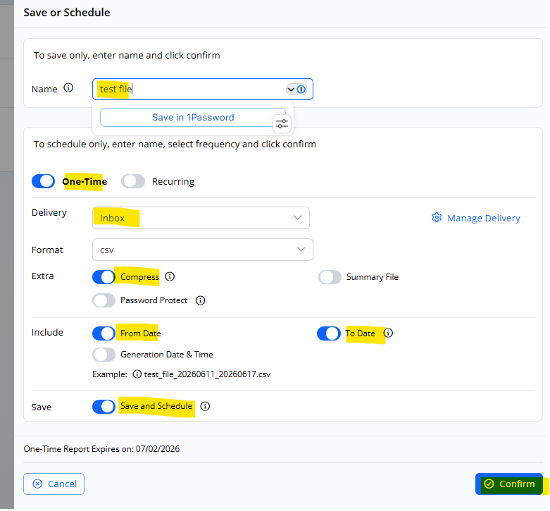
Enter a name for your file in the Name field.
-
Under To schedule only, turn on One-Time.
-
Set the delivery options:
-
Delivery: set to Inbox
-
Extra: turn on Compress
-
Include: turn on both From Date and To Date
-
Save: turn on Save and Schedule
-
Click Confirm.
-
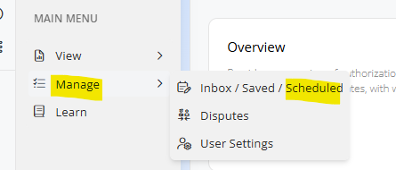
Your report will appear under Manage → Scheduled while it processes.
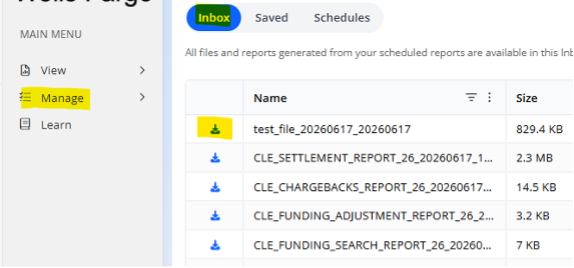
10. Once it's finished, it moves to Manage → Inbox. Click the download icon next to your file name to save it.
CLX/CCC Funding Adjustment Report
Path: Main Menu → View → Funding → Search → Select Fields → Save or Schedule → Confirm
-
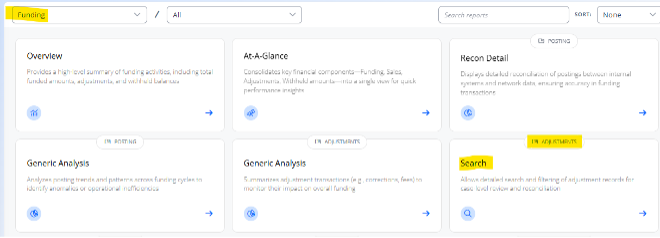
From the home page, open the Main Menu, click View, then click Funding.
-
Click the Search tile (labeled Adjustments) to open the funding adjustment search screen.
-
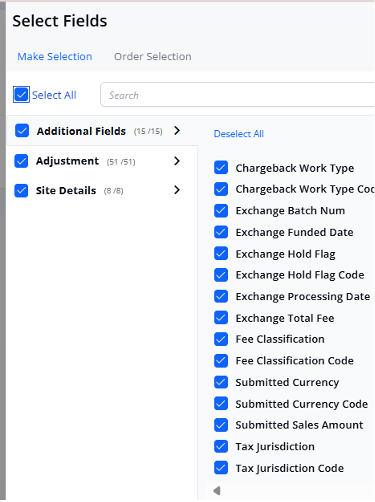
Click Select All in Select Fields to include every available field.
-
Schedule and run the report the same way you did for the Settlement Report above: enter a file name, turn on One-Time, set Delivery to Inbox, turn on Compress, turn on both From Date and To Date, turn on Save and Schedule, then click Confirm.
-
Find your finished report under Manage → Inbox, and click the download icon next to it to save the file.